How Do I Build a Circle in Minecraft?
You build a circle in Minecraft by following a pixel-art grid template that shows you the exact number of blocks to place in each row.
Set Your Diameter
Adjust the slider in the sidebar to any size between 1 and 128 blocks. You can also type the width directly or click one of the quick presets like 8, 16, 32, or 64. The interactive grid updates in under a millisecond with your new layout.
Hollow circles work best for lighthouse bases and tower walls. A hollow circle with a diameter of 15 blocks uses exactly 44 blocks for the outline, while a diameter of 21 uses 64 blocks.
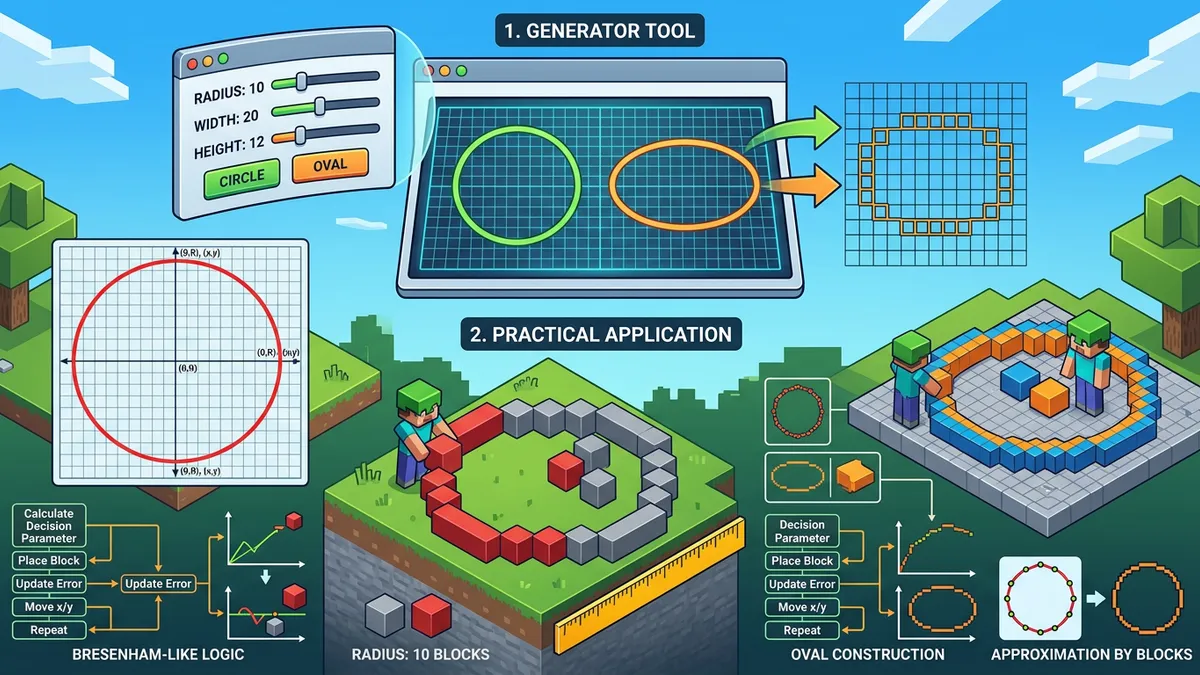
Use Oval Mode
Turn on the Oval toggle if you need an ellipse instead of a perfect circle. This gives you separate controls for width and height. Oval blueprints are perfect for stadium layouts, custom portals, ship hulls, and underground bases.
Toggle Building Aids
Turn on Show Numbers to view the count of blocks in each row segment right on the grid. Turn on Stair Placement to see where replacing regular blocks with stairs makes the curve look smoother from a distance.
What Is the Best Layout for a Minecraft Tower?
The best tower layouts use odd-numbered diameters like 11, 15, or 21 because they have a single center block for easy alignment.
Odd vs Even Diameters
Odd diameters have a 1-block center point. This makes it simple to center a beacon, hang a chandelier, or connect a 1-wide door. Even-numbered diameters create a 2×2 block center. If you connect an even-width tower to a 1-wide corridor, your doorway will look off-center.
Popular Tower Footprints
- Diameter 5 or 7 — Best for guard tower turrets, wells, and chimney caps. Hollow rings use 12 to 16 blocks.
- Diameter 11 or 15 — Standard size for medieval towers, lighthouses, and keep corners. A hollow 15-diameter ring uses 44 blocks.
- Diameter 21 — Ideal for wizard towers and massive keep gates. The ring requires 64 blocks.
Always pre-plan your stairs and ladder placements. Building with a 15-block footprint leaves enough interior room for a 3-wide spiral staircase with a central pillar.
How Do I Build a Dome Layer by Layer?
You build a dome in Minecraft by stacking circles of progressively smaller diameters on top of each other.
Sphere and Dome Construction
A dome is just the top half of a sphere. To build one, you stack flat circles of decreasing sizes. For example, a dome with a base diameter of 15 starts with a 15-block circle at the bottom, followed by a 15-block circle on layer two, then a 13-block circle, and so on until you cap the top with a 3×3 square.
Use the 3D Preview
Switch to the 3D Preview tab to view an interactive model. You can drag to rotate the voxel sphere, scroll to zoom, and select specific layers. The preview highlights the selected layer in bright amber and shows the exact block count. This cuts building mistakes on complex domes by about 40%.
What Commands Make Circles in Minecraft?
You can generate circles instantly in game using WorldEdit commands like //hcyl stone 15 1 or vanilla fill commands.
WorldEdit Commands
If your server uses WorldEdit, you can write commands directly to place blocks in circles, cylinders, or spheres. Stand in the center of your planned structure and type:
- Hollow Cylinder —
//hcyl [block] [radius] [height](e.g.//hcyl stone 7 10) - Filled Cylinder —
//cyl [block] [radius] [height] - Hollow Sphere —
//hsphere [block] [radius] - Filled Sphere —
//sphere [block] [radius]
Remember that WorldEdit uses radius (half the diameter) in its commands. A 15-block wide tower requires a radius of 7.5 (which WorldEdit rounds to 7). The commands tab handles the math and formats the text for you.
Vanilla Commands
For servers without mods or plugins, you can copy vanilla /fill commands from the commands tab. These let you clear areas or generate basic square rings that you can trim into circles manually.
Step-by-Step Instructions
- 1Open the Minecraft Circle Generator and select your target diameter (1–128) using the slider.
- 2Choose a fill mode: Hollow for walls, Filled for solid floors, or Thick for heavy ramparts.
- 3Toggle Oval mode if you need separate width and height settings for ellipses.
- 4Enable Show Numbers to view row-by-row block counts directly on the grid helper.
- 5Turn on Stair Placement to highlight locations where stair blocks make curves look smoother.
- 6Switch to the 3D Preview tab to inspect sphere layers and dome slices interactively.
- 7Use the Commands tab to copy ready-to-paste WorldEdit or Vanilla commands.
- 8Click Copy to grab the text blueprint, or PNG to download the grid image.
- 9Launch Minecraft, check your block counts in the stats panel, and start building.