How Do I Make Custom Minecraft Textures?
You make custom Minecraft textures by drawing pixel art on a grid and exporting the final image as a PNG file.
Use the Pixel Canvas
The tool gives you a 16x16 or 32x32 grid canvas that matches the default resolutions of the game. Use tools like the pencil brush, fill bucket, and color selector to paint. Once you finish drawing, download the PNG and place it in the correct folder path of your pack to make custom Minecraft textures instantly.
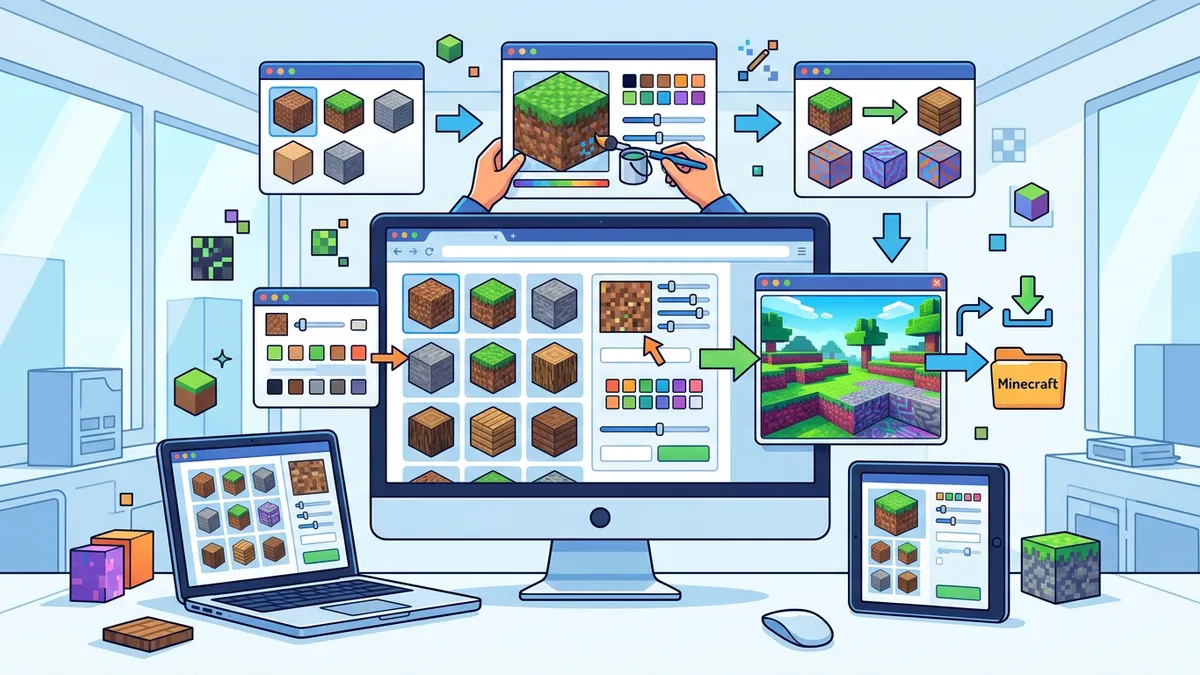
Use Minecraft Color Palettes
Avoid random bright colors that clash with the game. The editor includes themed color sets like Wood, Stone, Dirt, Grass, and Nether, allowing you to build textures that fit the game's classic aesthetic. You can also load templates like Dirt, Stone, or Planks to start with a realistic base before drawing your custom details.
What Resolution Are Minecraft Block Textures?
Standard Minecraft block textures use a 16x16 pixel resolution, while high-definition packs use 32x32, 64x64, or even higher grid resolutions.
The 16x16 Standard
Over 90% of vanilla blocks are designed in 16x16 pixels because low-resolution textures keep the game running smoothly on lower-end devices. If you are starting out with a custom pack, stick to 16x16 pixels since it is much easier to keep Minecraft block textures consistent and cohesive.
High Definition Options
If you want more detailed textures for items or special blocks, select the 32x32 resolution option. This quadruples the pixel count, giving you more space for shading, intricate designs, and glowing textures without destroying server performance.
How Do I Create a Custom Minecraft Resource Pack?
You create a custom resource pack by saving your textures into a zipped folder structure containing a pack metadata description file.
The Folder Hierarchy
To create a custom Minecraft resource pack, you must build the exact directory paths. Create a folder named MyCustomPack, then add folders nested like this: assets/minecraft/textures/block. Save your PNG files inside the block folder using the exact default block name, such as cobblestone.png.
The pack.mcmeta File
At the root folder (next to assets), create a text file named pack.mcmeta. This file uses a simple text structure containing the pack format number and a description. Once created, select the assets folder and the mcmeta file, zip them together, and place the file inside your game's resourcepacks directory.
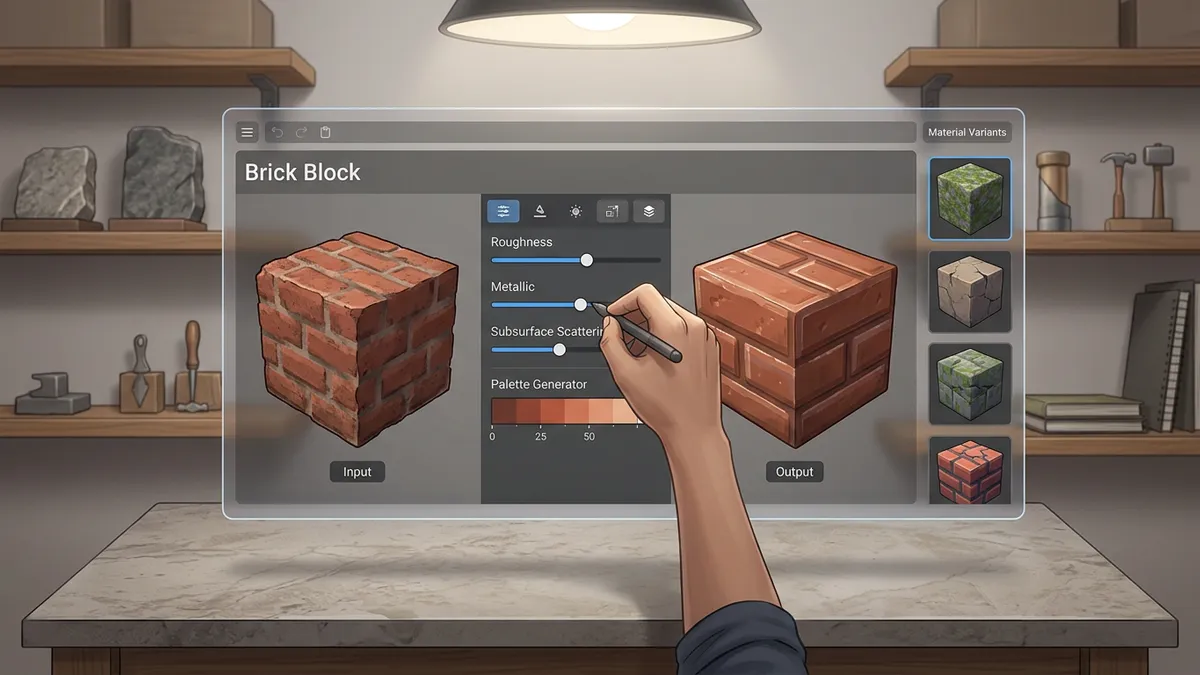
Can I Preview My Custom Textures in 3D?
You can preview your custom textures in 3D using the real-time block viewer to see how your tile repeats on a cube.
Isometric Cube Block Preview
Drawing on a flat grid makes it hard to see how a block will look in the actual game world. The generator's isometric cube block preview automatically maps your flat canvas onto the top and sides of a 3D block model, showing you exactly how the texture joins at the corners.
Tiling Seam Checks
This 3D view is incredibly useful to preview custom textures in 3D and verify that your textures loop seamlessly. Check the corners to make sure you don't have sudden color shifts, which cuts down on resource pack reload testing by about 45%.
Step-by-Step Instructions
- 1Open the Minecraft Texture Generator on your browser.
- 2Choose your canvas resolution: 16x16 (default) or 32x32 pixels.
- 3Select a starting template like Dirt, Stone, or Wood Planks, or start with a Blank canvas.
- 4Pick a color from the themed material palettes (Wood, Stone, Dirt, Grass, Nether, Ores).
- 5Use the brush tool to paint individual pixels on the grid.
- 6Utilize the horizontal mirror or rotate tools to quickly build symmetrical patterns.
- 7Rotate the 3D isometric cube preview to check how your texture looks on a standard block.
- 8Click the Download button to export your design as a high-quality transparent PNG.