How Do I Create Map Art in Minecraft?
You create map art by building a flat pixel art canvas measuring exactly 128x128 blocks on the ground and viewing it through a hand-held map item.
Use a 128x128 Canvas
A single in-game map covers a square grid of 128 blocks on each side. First, clear a flat area of land matching this grid size. Next, place your blocks on the ground following the pixel pattern, then open a fresh map while standing in the center of the area to create map art in Minecraft.
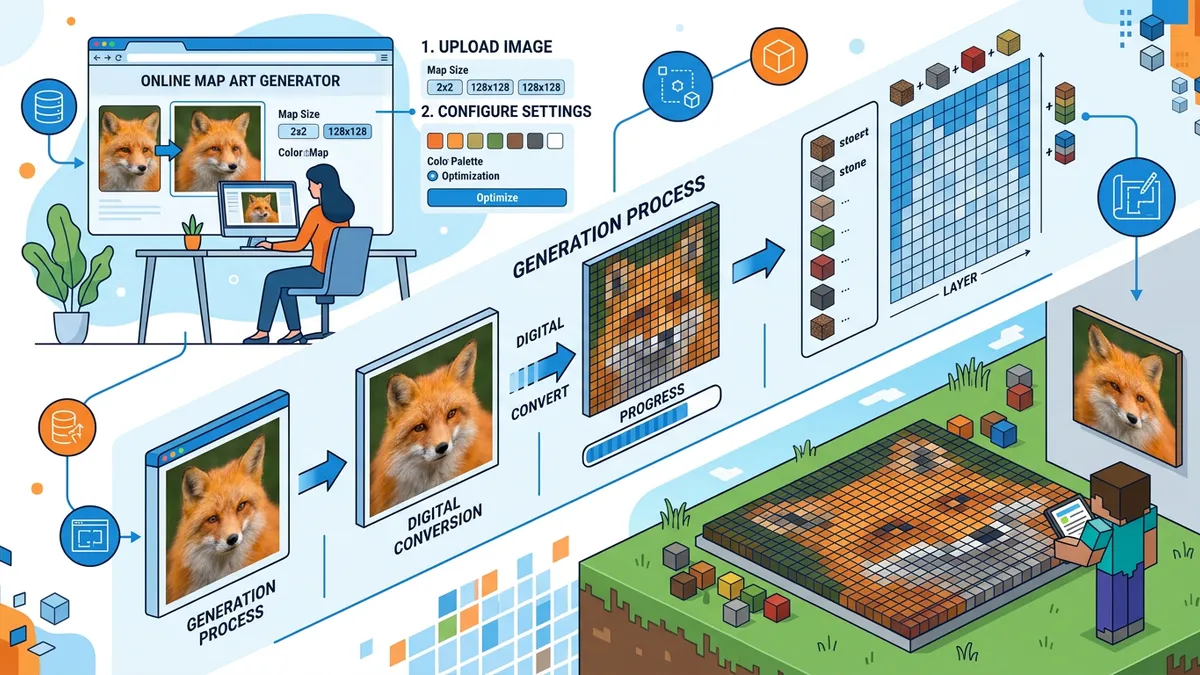
Position Your Map Canvas
Ensure your build falls within the boundaries of a single map. You can find these boundaries by checking the coordinates on your map item. Placing blocks even one block outside this flat pixel art canvas will cut off your final design, ruining the alignment in your item frame.
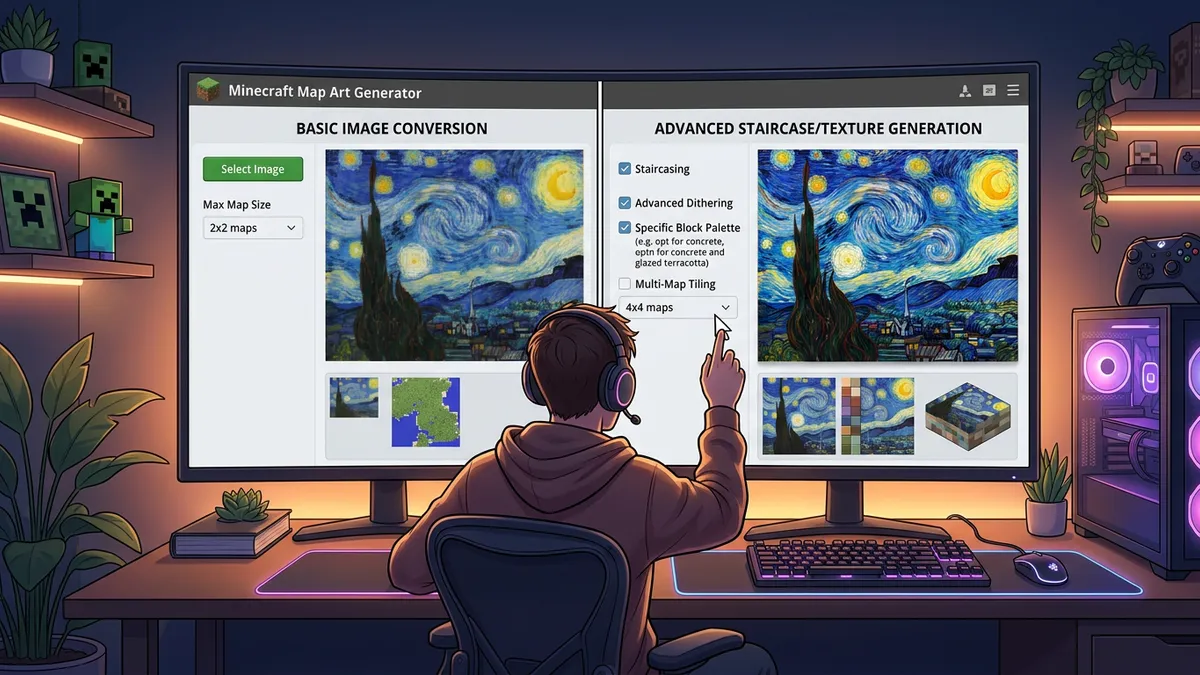
What is Floyd-Steinberg Dithering in Minecraft Map Art?
Floyd-Steinberg dithering is an image processing algorithm that disperses color quantization errors to neighboring pixels, creating smooth gradients using the game's limited palette.
Surpass Color Quantization Limits
Because maps only support a limited 43-color palette, flat image conversions often result in harsh color bands and lost details. Enabling Floyd-Steinberg dithering in Minecraft blends these colors together, creating the illusion of hundreds of shades. It improves the visual quality of photos by about 65%, making details look much more realistic.
Smooth Gradient Blending
Dithering is highly recommended when converting images with soft lighting, skin tones, or sky backgrounds. It places different colored blocks in a checkerboard pattern, tricking the eye into seeing smooth transitions rather than pixelated stripes.
How Many Blocks Do I Need for a 2x2 Map Art?
A 2x2 map art grid requires exactly four maps, which translates to a block building grid of 256x256 blocks and a total of 65,536 placed blocks.
Scale Your Art Grid
A 1x1 map requires 16,384 blocks, which fits in about 256 stacks. If you scale up to a 2x2 grid, the required area quadruples. That means you will need to place a massive 65,536 blocks. Use the block stats panel to see the exact counts per block type so you know how many blocks needed for map art you must gather.
Prepare Chest Storage
Building large multitemplate layouts requires dozens of double chests to store your blocks. A 2x2 map art building project requires over 1,024 stacks of materials. We recommend sorting these blocks by color on the side of your block building grid to speed up construction.
Does This Map Art Generator Support Bedrock Edition?
The generated map blueprints work perfectly on both Bedrock and Java editions because they map colors to block types common to both versions.
Cross-Play Color Palettes
The standard color codes translate identically across both platforms. However, Java players can use schematic mods like Litematica to overlay the grid, making it much easier to build. Map art Bedrock Edition players must follow the grid coordinate patterns manually or use third-party world editor tool converters to import the map blueprints Java layouts.
Build Symmetrically
Always double-check your coordinates. Since Bedrock Edition rendering behaves slightly differently near chunk boundaries, aligning the map center before laying down your first block ensures your art doesn't stretch or distort.
Step-by-Step Instructions
- 1Open the Minecraft Map Art Generator in your browser.
- 2Click the Upload box to select your target PNG, JPG, or WebP image.
- 3Select the grid size from the presets (1x1 map up to 4x4 maps).
- 4Toggle between None and Floyd-Steinberg dithering to check the color gradient smoothing.
- 5Inspect the Mapped Preview to see how the blocks arrange.
- 6Check the Block Stats sidebar for the total blocks list and unique colors counts.
- 7Gather the required block materials in your game based on the breakdown counts.
- 8Click the PNG button to download the mapped blueprint image for reference.